In this post I would love to combine my favorite RDBMS , which is SQL Server with hottest Azure service out there – AKS. AKS is Azure hosted Kubernetes based container orchestration service. AKS reduces the complexity and operational overhead of managing Kubernetes by offloading much of that responsibility to Azure. As a hosted Kubernetes service, Azure handles critical tasks like health monitoring and maintenance for you.
Why run SQL Server in containers orchestrated by Kubernetes?
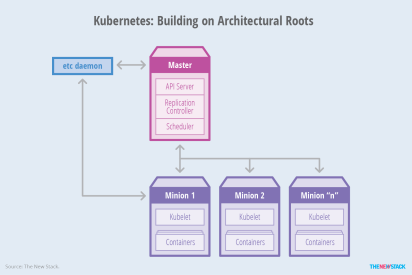
Over the past year, Kubernetes — also known as K8s — has become a dominant topic of conversation in the infrastructure world. Given its pedigree of literally working at Google-scale, it makes sense that people want to bring that kind of power to their DevOps stories; container orchestration turns many tedious and complex tasks into something as simple as a declarative config file.
The rise of orchestration is predicated on a few things, though. First, organizations have moved toward breaking up monolithic applications into microservices. However, the resulting environments have hundreds (or thousands) of these services that need to be managed. Second, infrastructure has become cheap and disposable — if a machine fails, it’s dramatically cheaper to replace it than triage the problems.
So, to solve the first issue, orchestration relies on the boon of the second; it manages services by simply letting new machines, running the exact same containers, take the place of failed ones, which keeps a service running without any manual interference.
However, up until recently K8s were only used by stateless aps and couldn’t work with stateful applications and databases. Managing state in Kubernetes is difficult because the system’s dynamism is too chaotic for most databases to handle–especially SQL databases that offer strong consistency.
Only since StateFull sets were introduced in K8s we can start thinking about running databases in K8s. By far the most common way to run a database, StatefulSets is a feature fully supported as of the Kubernetes 1.9 release. Using it, each of your pods is guaranteed the same network identity and disk across restarts, even if it’s rescheduled to a different physical machine. In AKS in order to run an RDBMS like SQL Server I will need to create persisted volume.
A Persisted Volume (PV) is a piece of storage in the cluster that has been provisioned by an administrator. It is a resource in the cluster just like a node is a cluster resource. PVs are volume plugins like Volumes, but have a lifecycle independent of any individual pod that uses the PV. This will allow our pods to go up and down and our volume to stay available.
So all you need to setup SQL Server in Azure Kubernetes PaaS service (AKS) is really an Azure account. FIrst thing lets install Azure CLI. I am using Windows machine, but recently I was able to install and run Azure CLI on mac as well , of course. Instructions for Windows install can be found here –https://docs.microsoft.com/en-us/cli/azure/install-azure-cli-windows?view=azure-cli-latest.
If you dont want to install Azure CLI on your machine you can simply use it with Azure Cloud Shell on the Azure Portal – https://docs.microsoft.com/en-us/azure/cloud-shell/overview . Recently I used GCP Cloud Shell and this , as well as Azure Cloud Shell are great idea if you dont want to or cannot install CLI\SDK on your machine.
Once you installed CLI, lets login to your Azure subscription.
az login
This will launch your default browser for you to login. Once you logged in , you can list subscriptions you have via this command
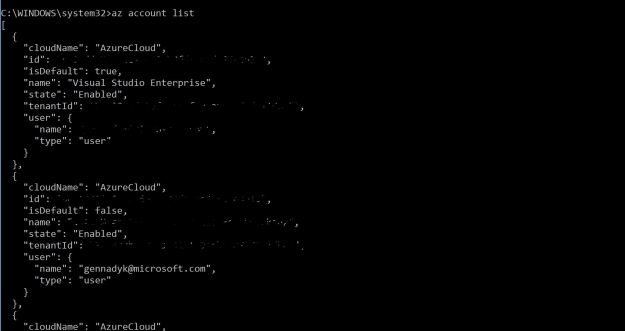
az account list
Below picture shows output of above command , I erased all of the unique information
Once the login process is complete and you are operating in the right subscription, the resource group to hold all the objects of the Kubernetes cluster can be created:
az group create --name GennadyKSQLK8s--location eastus
You should be able to see new resource group in Azure Portal UI:

Once resource group is created we can build AKS cluster in that resource group.
az aks create --resource-group GennadyKSQLK8s --name mySQLK8sCluster --node-count 2 --generate-ssh-keys
There is a lot going behslightly ind the scenes of this one command so you may have to be a bit more patient, something I am not known for:

In few minutes we are done and cluster is created. Next lets install kubectl to manage Kubernetes cluster.
az aks install-cli
Setup PATH for kubectl:
set PATH=%PATH%;C:\Users\Gennady\.azure-kubectl
Next, lets grab credentials in order to connect and manage the cluster: –
az aks get-credentials --resource-group=GennadyKSQLK8s --name=mySQLK8sCluster
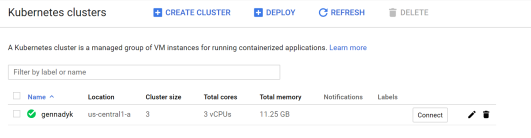
The cluster is setup and we can connect. Lets test it by listing cluster nodes:
kubectl get nodes
The output is below:

There are the two nodes of the cluster and it is ready to host a sql instance in a pod. Now we need to create new persisted volume and instance of SQL Server on Linux.
We will begin by creating SA password for SQL Server in Kubernetes cluster. Kubernetes can manage configuration information like passwords as secrets.
kubectl create secret generic mssql --from-literal=SA_PASSWORD="MyP@ssw0rd1"
Now we need persistent volume and persistent volume claim in Kubernetes. Here are the steps to get that created:
-
-
- Create a manifest to define the storage class and the persistent volume claim. The manifest specifies the storage provisioner, parameters, and reclaim policy. The Kubernetes cluster uses this manifest to create the persistent storage. I will use following YAML to define my storage class and persistent volume claim:
kind: StorageClass
apiVersion: storage.k8s.io/v1beta1
metadata:
     name: azure-disk
provisioner: kubernetes.io/azure-disk
parameters:
  storageaccounttype: Standard_LRS
  kind: Managed
---
kind: PersistentVolumeClaim
apiVersion: v1
metadata:
  name: mssql-data
  annotations:
    volume.beta.kubernetes.io/storage-class: azure-disk
spec:
  accessModes:
  - ReadWriteOnce
  resources:
    requests:
      storage: 8Gi
I will save above YAML as disk.yaml on my computer.
- Next , we create the persistent volume claim in Kubernetes. Lets run this command:
kubectl apply -f C:\Users\Gennady\Downloads\disk.yaml
Obviously, your yaml file location may be different than mine above
Result shown below:

The persistent volume is automatically created as an Azure storage account, and bound to the persistent volume claim
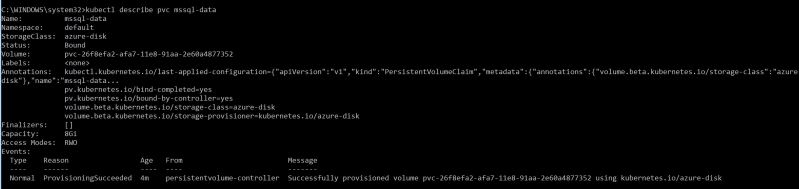
- Verify the persistent volume claim. We can run following command:
kubectl describe pvc mssql-data
The output can be seen below:
Now you should be able to see this volume in the portal as part of our resource group:

Now, that the persistent volume is added we need to add the SQL Server deployment. The deployment creates a replica set. The replica set creates the pod. The deployment described via YAML manifest like below:
apiVersion: apps/v1beta1
kind: Deployment
metadata:
  name: mssql-deployment
spec:
  replicas: 1
  template:
    metadata:
      labels:
        app: mssql
    spec:
      terminationGracePeriodSeconds: 10
      containers:
      - name: mssql
        image: microsoft/mssql-server-linux
        ports:
        - containerPort: 1433
        env:
        - name: ACCEPT_EULA
          value: "Y"
        - name: SA_PASSWORD
          valueFrom:
            secretKeyRef:
              name: mssql
              key: SA_PASSWORD
        volumeMounts:
        - name: mssqldb
          mountPath: /var/opt/mssql
      volumes:
      - name: mssqldb
        persistentVolumeClaim:
          claimName: mssql-data
---
apiVersion: v1
kind: Service
metadata:
  name: mssql-deployment
spec:
  selector:
    app: mssql
  ports:
    - protocol: TCP
      port: 1433
      targetPort: 1433
  type: LoadBalancer
I will save above YAML to my computer as deployment.yaml file. Now I can run this to deploy:
kubectl apply -f C:\Users\Gennady\Downloads\deployment.yaml
You should see following output:

The deployment and service are created. The SQL Server instance is in a container, connected to persistent storage. Now lets connect to the pod to verify pod was created via kubectl get pod

Now lets verify that services are running via kubectl get services.

This command returns services that are running, as well as the internal and external IP addresses for the services.
Finaly , lets connect to our SQL Server instance using sqlcmd:

Hope this helps and happy steering the cloud databases. For more see – https://kubernetes.io/docs/home/?path=browse, https://docs.microsoft.com/en-us/sql/linux/tutorial-sql-server-containers-kubernetes?view=sql-server-2017, https://joeydantoni.com/2018/03/29/getting-started-with-sql-server-and-kubernetes/, https://cloudblogs.microsoft.com/sqlserver/2018/05/29/sql-server-at-the-red-hat-summit-2018/.